Applies to Windows 10 and Windows 11. Make sure your UnicornCROSS service is active and the Windows client is installed.
1. Download and open the client
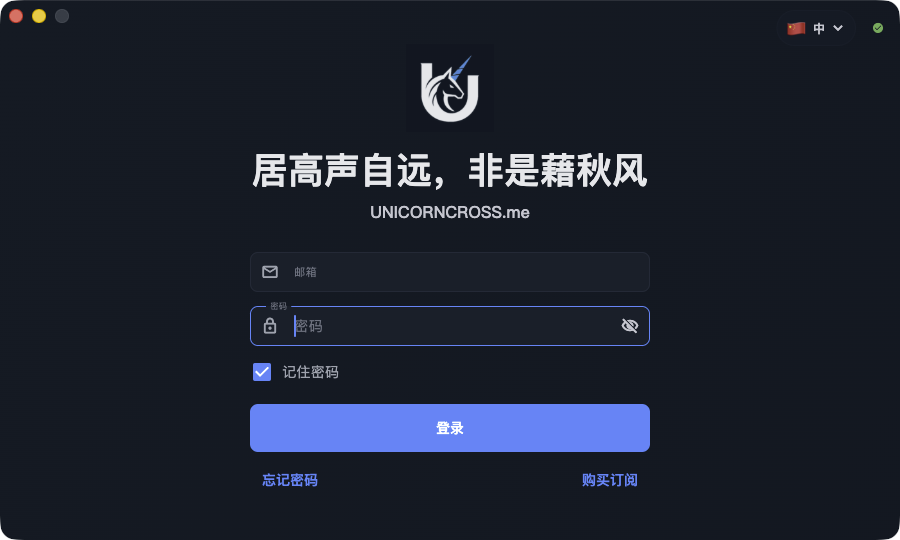
Sign in to the client center, then download the Windows client from your service details or download entry. Install it and open UnicornCROSS.
If Windows asks for network or VPN-related permissions, allow them so the client can apply the system proxy.
2. Update configuration after sign-in
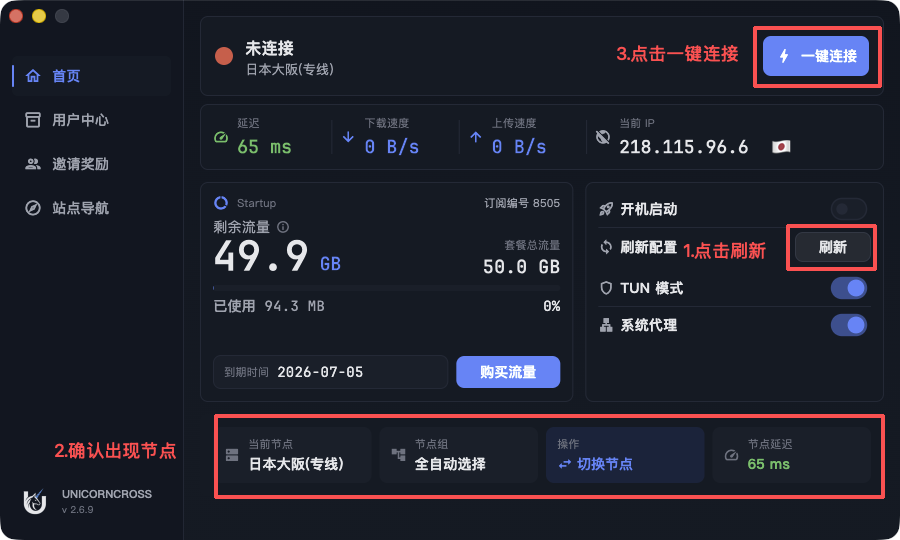
Sign in to the UnicornCROSS client. After sign-in, open the home dashboard and select Update to refresh configuration.
Wait for the refresh to finish and confirm the node list has loaded. If no nodes appear, check that your service is active, sign in again, then select Update once more.
3. Connect with one click
After nodes are available, select One-click connect. When the connection succeeds, the client changes from disconnected to connected and shows the current node, latency, or IP information.
If the connection is unstable, update again, switch the node or node group, then use One-click connect again.